The Annapurna Base Camp Trek beginning from a base in Pokhara is a great beginner multi-day trek for reasonably fit travellers. We completed the Annapurna Base Camp trek in 7 days without a guide but took a jeep for a short way at the start and end to minimise time. We had never done a multi-day trek before and hadn’t done any preparation beforehand. It was challenging but completely manageable and oh so worth it!
Wondering where else to go in Nepal? Have a read of our Nepal Itinerary
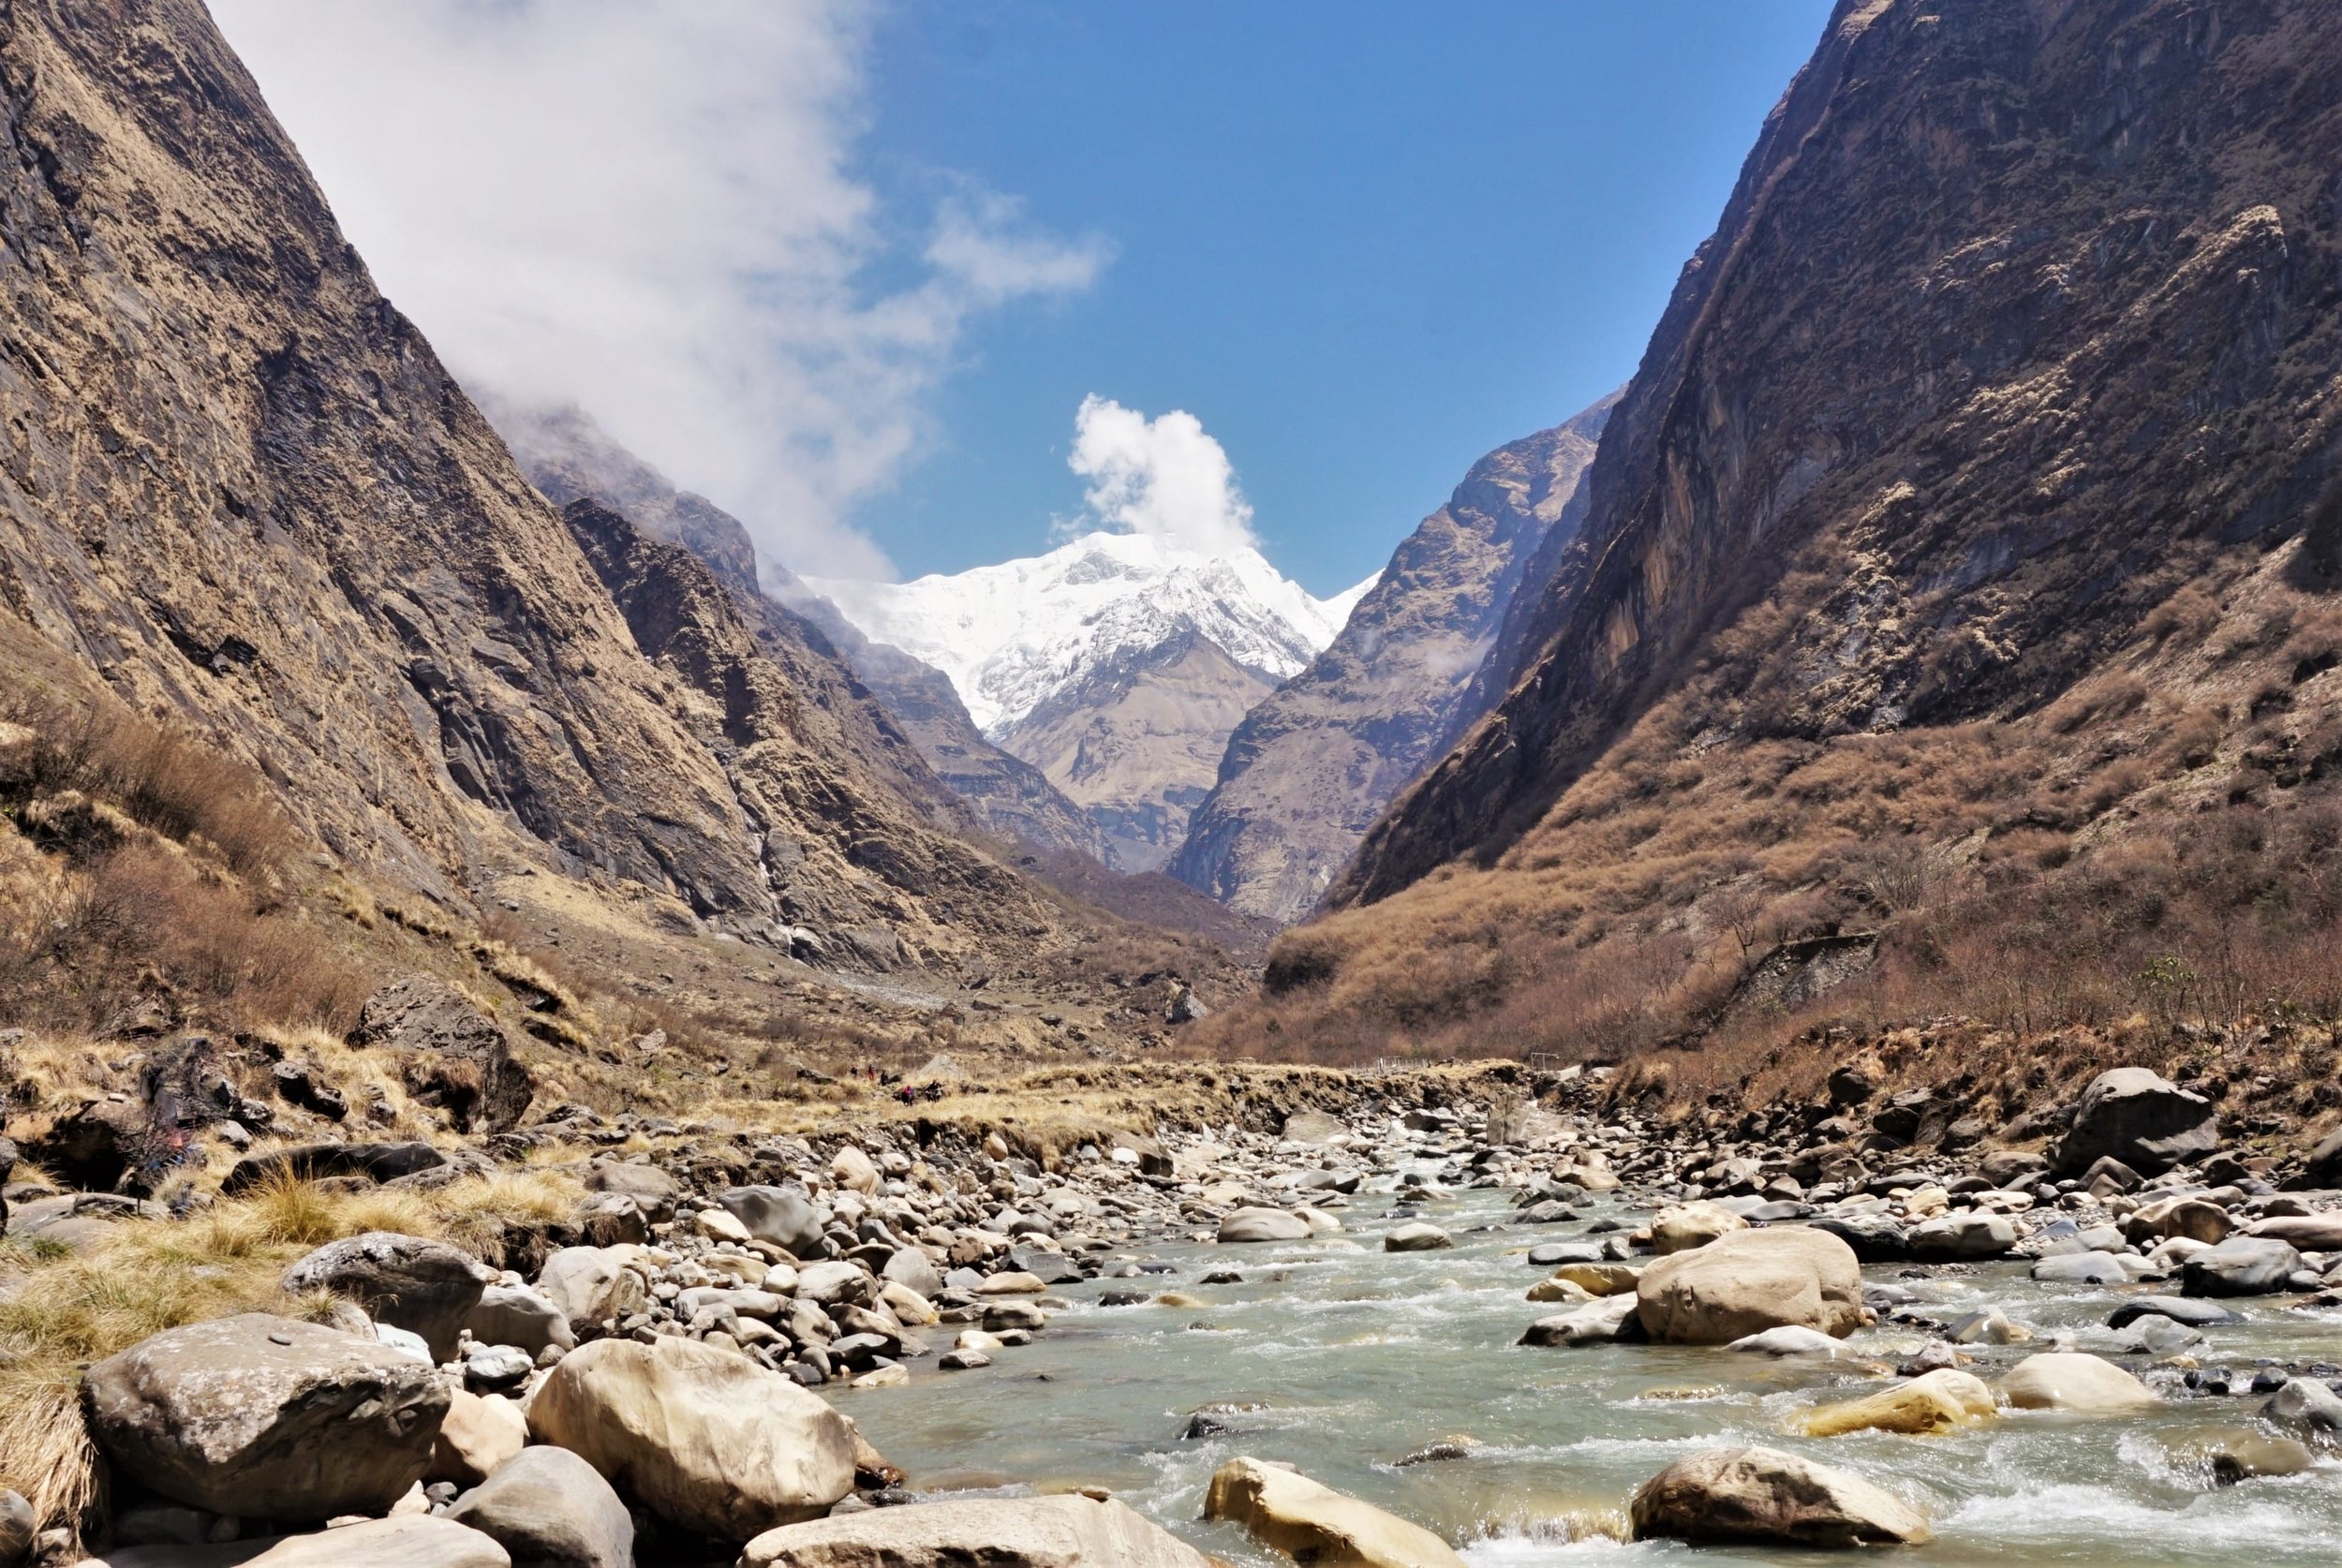
Amazing views up the valley towards the Annapurna peak along the Annapurna Base Camp Trek.
Annapurna Base Camp Trek Basic Facts
Distance: Aprox 60km depending on where you start and what route take.
Time: 5-7 days
Difficulty: Moderate-difficult. Some very steep areas and high altitude but good paths most of the way.
Best time to do the Annapurna Base Camp trek
There are two main seasons for trekking in Nepal. The first is in late October- November when the weather is dry and warm. The second is the start of spring from April- May when it can be wetter but flowers are in bloom. We did the Annapurna Base Camp trek in mid-April and had some afternoon rain on sometimes but also completely sunny days.
Permits for Annapurna Base Camp Trek
In order to trek in most parts of Nepal you will need a TIMs card and permit. These are available at the tourist centres in Kathmandu or Pokhara. The Pokhara one is a short walk from the tourist bus station so it works well to go straight there on your arrival to Pokhara.
Permits are required for the Annapurna Base Camp trek.
The TIMS card costs 2000 NPR for foreigners and the permit 2260 NPR. You will need to provide 4 passport photos which they take and print for you at the Pokhara centre free of charge. If, like us, you decide to get them done it advance (we didn’t know it was done at the centre) it costs 200 NPR for 4 photos.
The entire process takes around 15 minutes but it can be longer if the centre is busy.
Where to stay in Pokhara before and after the trek
Pokhara is made for pre and post trek tourists and is filled with gear hire shops, cafes, massage centres and comfortable accommodation.
As budget backpackers we enjoyed the comforts of Pokhara Backpackers Hostel which had really comfortable, light rooms, luggage storage options while we were hiking and loads of helpful information. Check out availability and prices here.
If you’re looking for a nicer option with private rooms with balconies and attached bathrooms try the beautiful Hotel Batika. Check out availability and prices here.
Do you need a guide for the Annapurna Base Camp Trek?
We decided to do the Annapurna Base Camp trek without a guide or porter and think we made a good decision. There is a very low chance of getting lost along the route, there are signs in each village indicating how long to the next village and it’s much cheaper to do it independently. We also met lots of other travellers along the way and it was fun to arrange to stay in the same villages and trek together, people travelling with guides had a stricter schedule of where they needed to stay and how far to trek each day.
Amazing lush vegetation at the beginning of the Annapurna trek
If you do hire a guide make sure they speak decent English and are on your wavelength about your fitness level, expectations and level of flexibility. We were quoted $25USD per day for a guide, regardless of group size. There are cheaper options available but this gets a bit unethical.
What about a porter?
The same is true for porters. We left some of our stuff at our hostel in Pokhara and carried all of our own stuff (aprox. 7kg). It made the trek a bit harder but also more rewarding. If you feel that you can’t carry your own gear then porters can be hired for around $20 per day and can carry two people’s stuff. But please only give them what you need, just because you aren’t carrying it doesn’t mean you should over pack!
Temperatures on the Annapurna Base Camp Trek
During the day temperatures are mostly pleasant and after warming up a t-shirt is fine for trekking with a warmer layer to put on when you stop. At night the temperature drops sometimes quite dramatically and you will need a couple of warmer layers. Expect it to get below zero at the base camp at night (we were there in April) and below 10 degree Celcius further down.
Early morning views of Annapurna peak from the Annapurna Base Camp.
Route and itinerary for the Annapurna Base Camp Trek
The start of your trek is up to you. Many people do the Annapurna Circuit or Poon Hill treks before and join the Annapurna Base Camp trek in Chomrong. If you are coming from Pokhara there are several options to begin your trek:
Transport from Pokhara to the beginning of the Annapurna trek
1. Take a bus from Pokhara to Kimchi (400 NPR takes aprox 4 hours) and begin trekking from there.
2. Take a taxi or jeep to Nayapul (2000 NPR, 2 hours) and either trek from there or take a jeep further to Gandruk (1500-2500 NPR, 2 hours)
The part of the trek before Kimchi and Gandruk is not very exciting and is mostly along the dusty jeep road. I would recommend going as far as possible by vehicle to save time and energy. You will need to stop in Birethanti twice to register your permit and later on again in Chomrong.
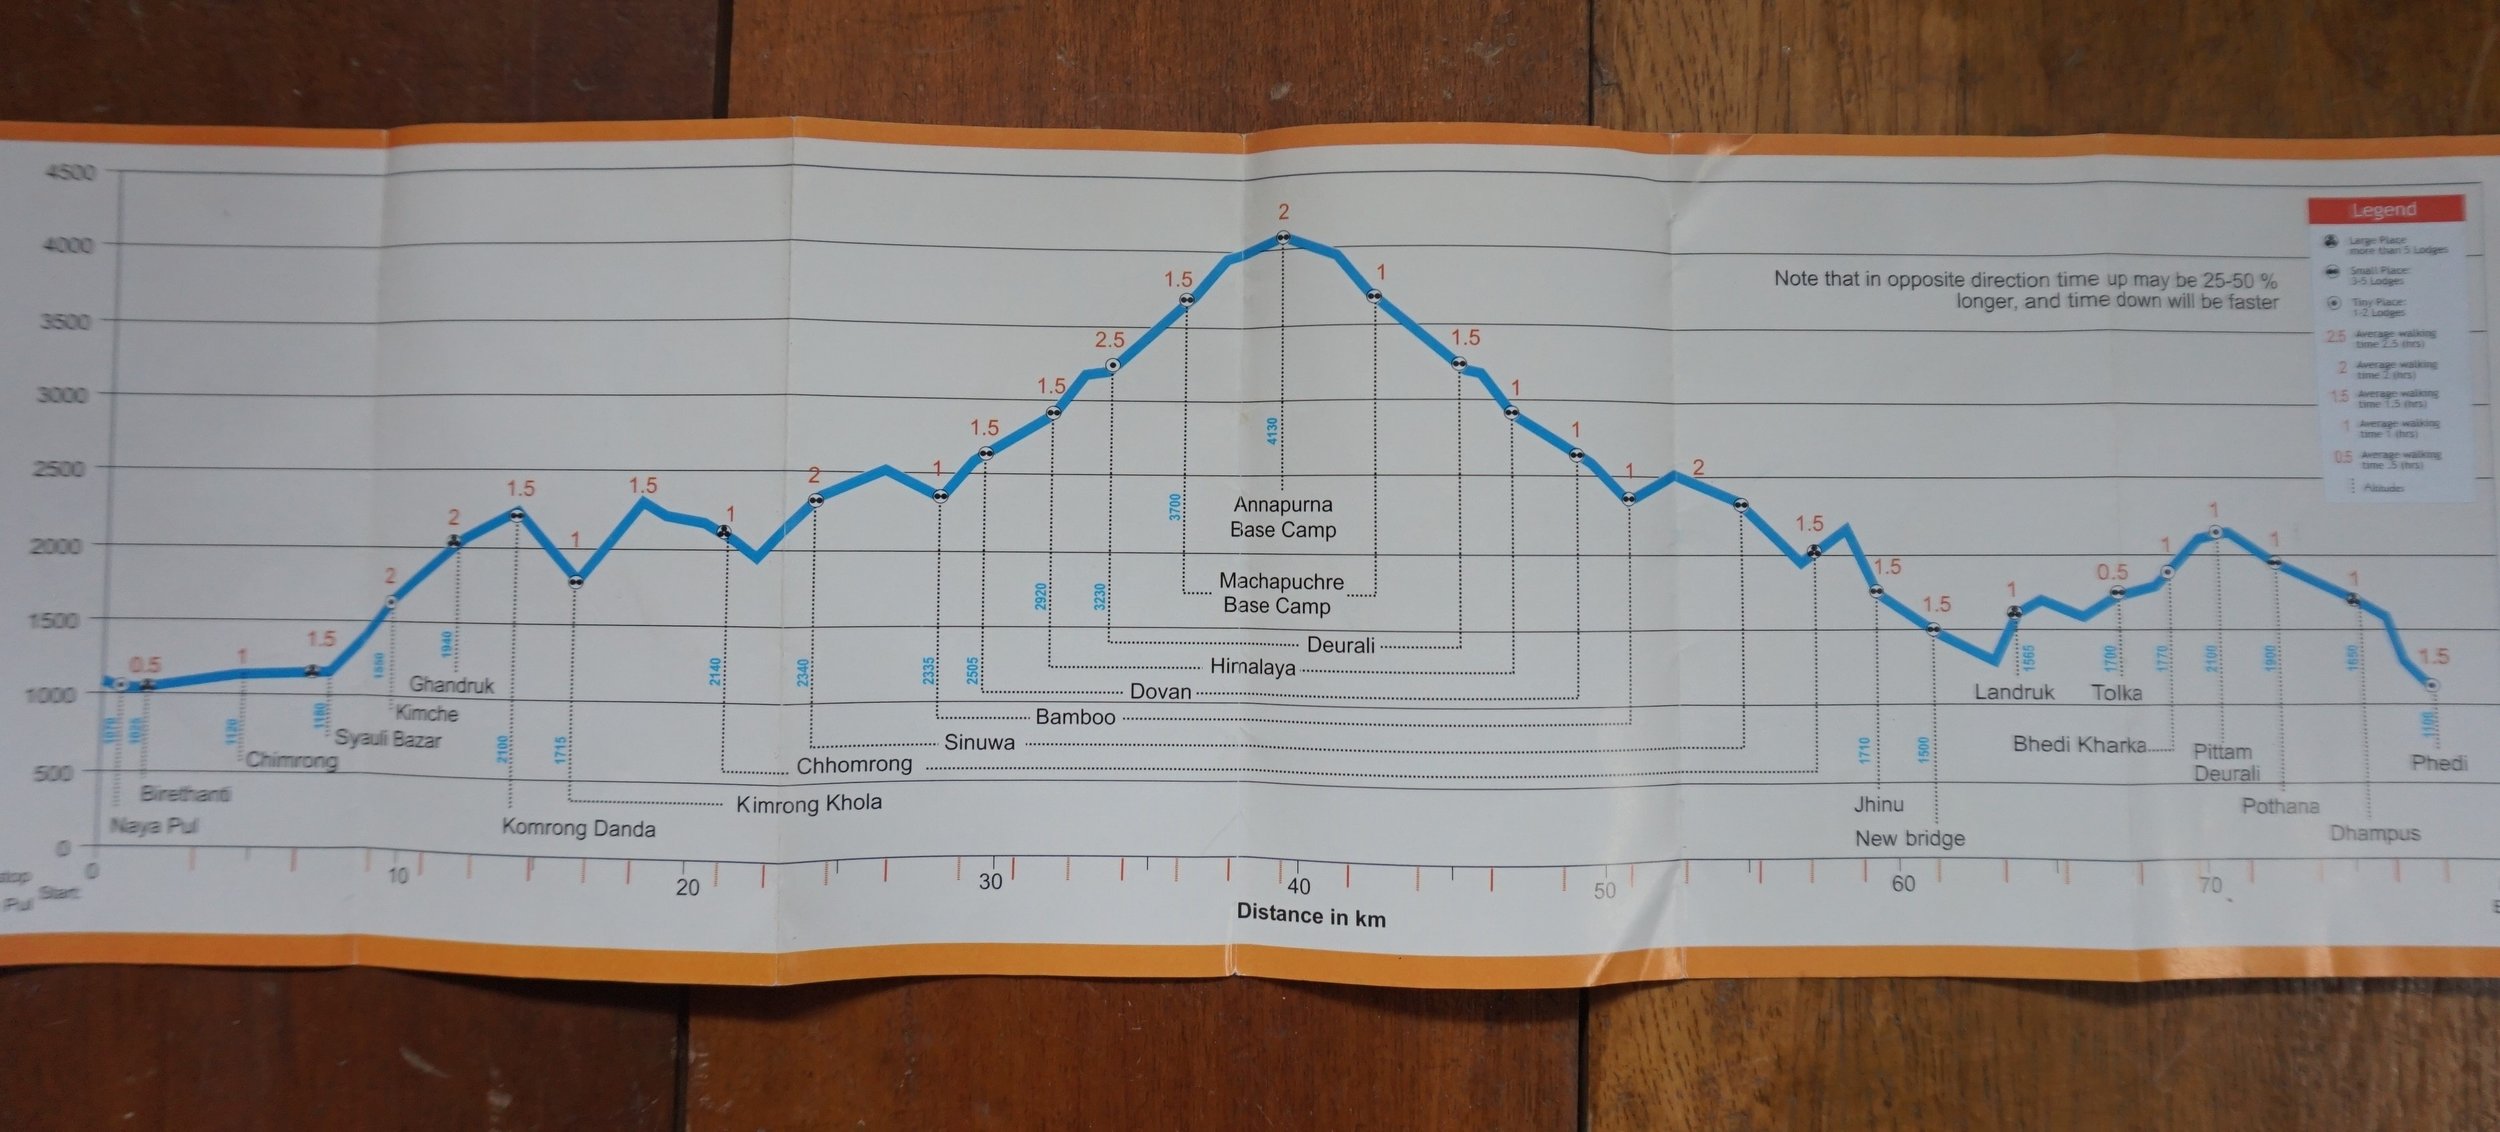
Below is an outline of the trek by day as we did it. The photo is of a very useful map given to us when we applied for our permits. It tells you roughly the distance, time and climb between each of the towns allowing you to plan each day depending on your abilities, energy levels and time. It is best not to have set parts to achieve each day and just see how it goes as you never know what will happen with weather, injuries etc.
Outline of the Annapurna Base Camp trek.
Day one
Taxi + jeep to Kimchi
Kimchi to Ghandruk – 1 hr up steep stairs
Ghandruk to Komrong – 1 hr mostly flat
Overnight Komrong (due to rain)
Day two
Komrong to Kimrong – 1hr steep downhill
Kimrong to Chomrong – 2.5 hrs steep uphill followed by flat
Chomrong to Sinuwa – 1.5 hrs steeply down a valley and back up the other side.
Overnight Sinuwa (due to rain)
Sometimes it can get quiet steep up towards the summit.
Day three
Sinuwa to Bamboo – 1hr 15 min lots of stairs and downhill
Bamboo to Dovan – 50 mins easy going
Dovan to Himalaya – 1.5 hrs uphill through lots of dense jungle
Himalaya to Durali – 1 hr 10 mins steep uphill and then flat, amazing scenery
Overnight Durali
Day four
Durali to MBC – 1.5 hrs mostly flat with some uphill parts
MBC to ABC – 1hr 20 min easy going up hill but harder at altitude
Overnight at MBC (we didn’t have clear views so should have stayed at ABC for next morning)
Day Five
Up to ABC for sunrise
MBC to Bamboo – 4 hrs
Overnight in Bamboo
Day six
Bamboo to Jhinu to stop at the hot springs – 4.5 hrs
Overnight Jhinu
Day Seven
Jhinu to the road to get a jeep back to Pokhara – 3 hrs
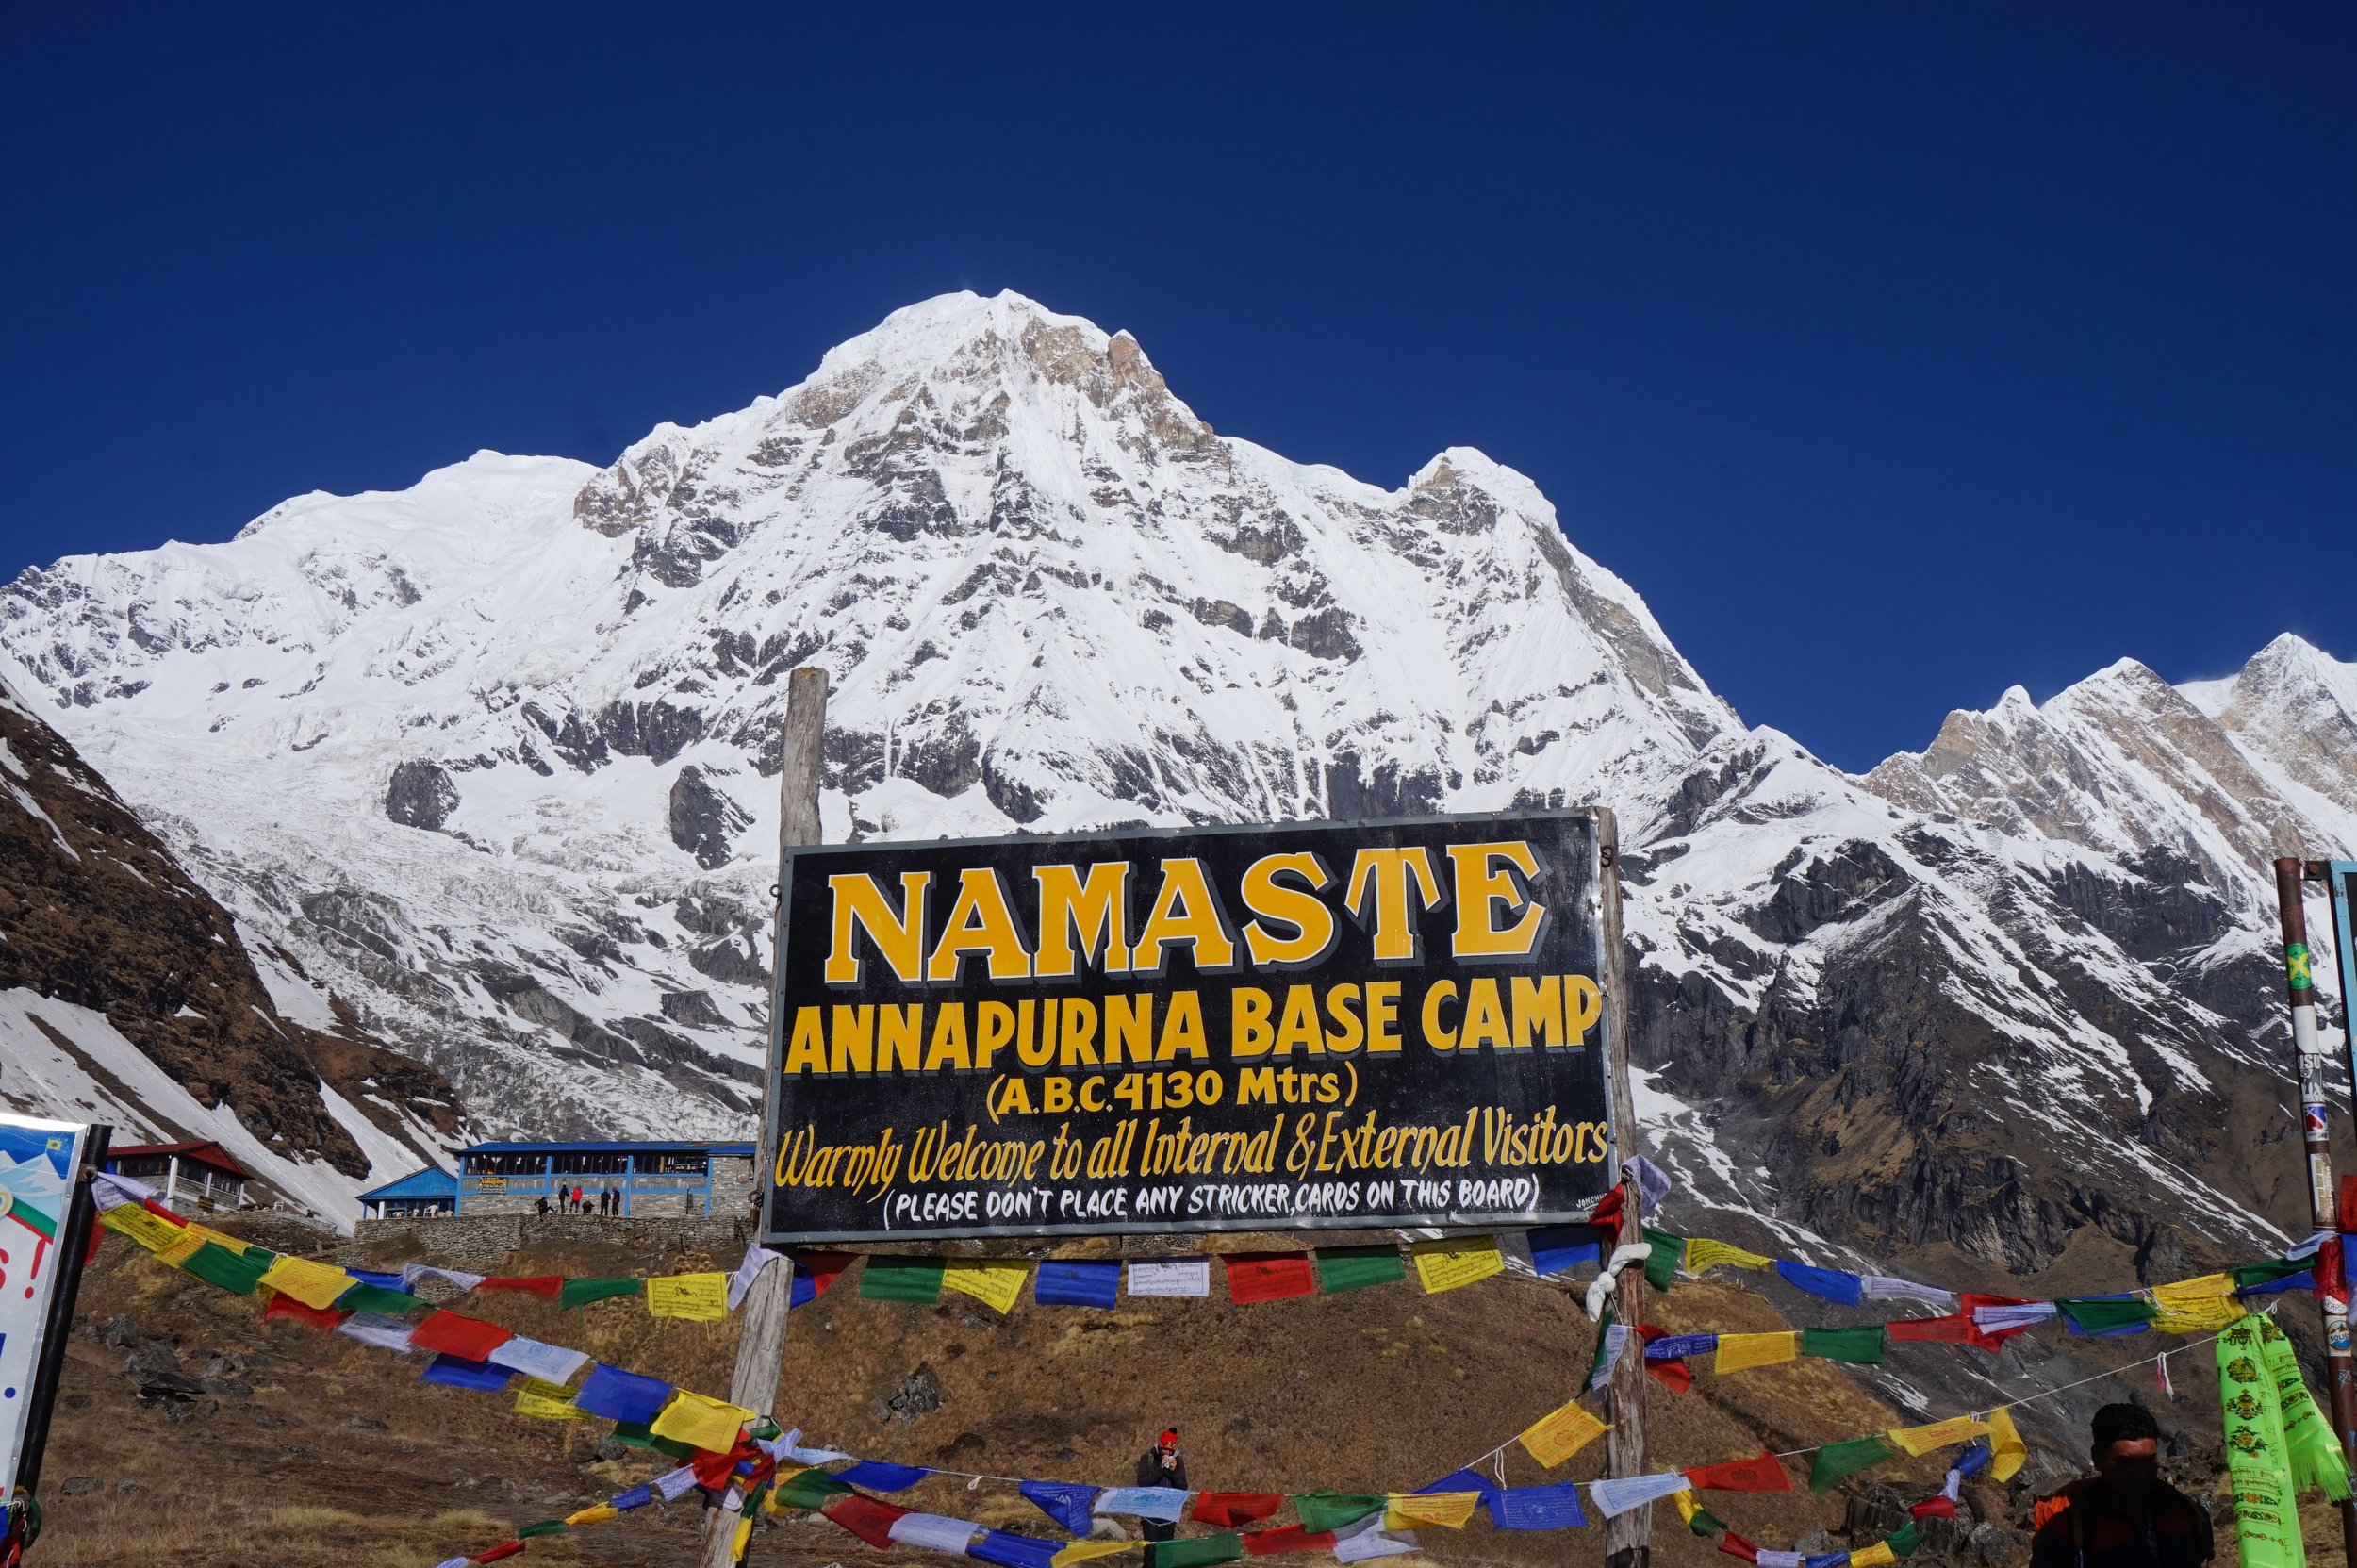
Finally reached the Annapurna Base Camp at 4130 meters!
Accommodation on the Annapurna base camp trek
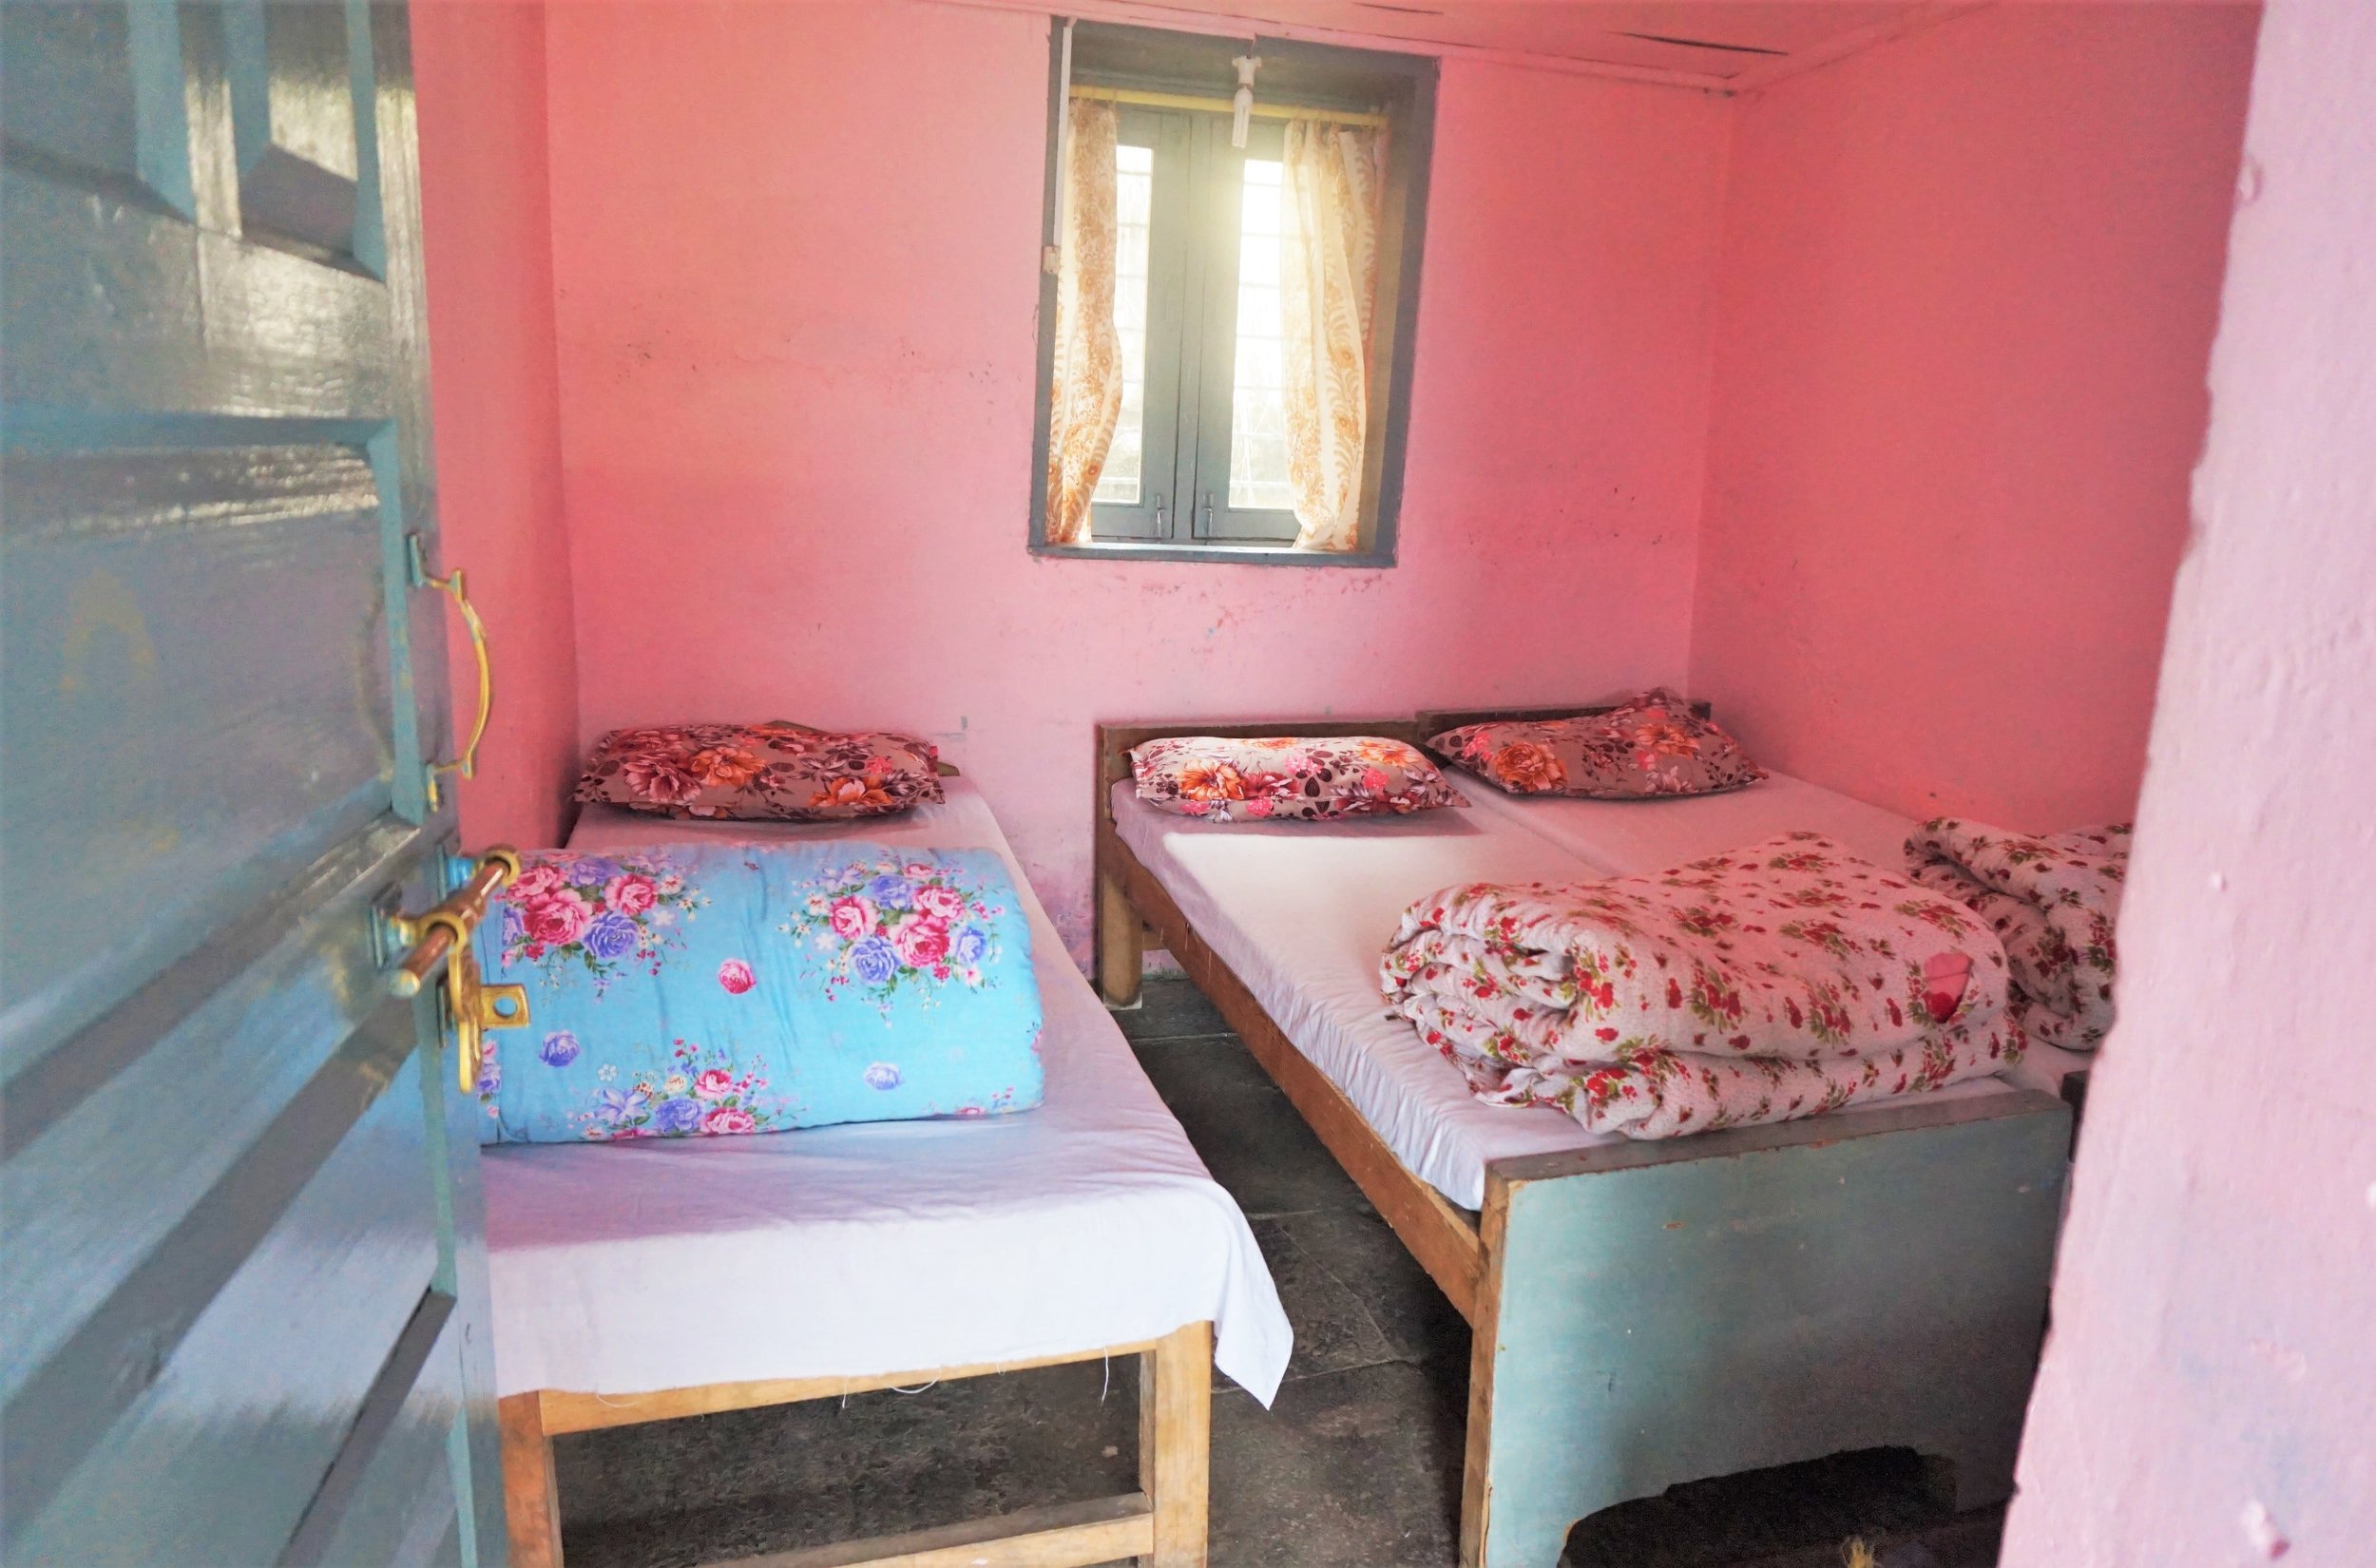
Accommodation along the route is in the form of tea houses. At the start of the trek they are in villages where locals live and work however further up these huts have been specifically built for trekkers. The standards are basic but comfortable (mostly). Rooms have anywhere from 2 beds to a dorm of 7 or 8. Expect a thin mattress, pillow and warm blanket. The sheets were varying levels of clean and we preferred to use our sleeping bag liners (get one here).
Accommodation along the Annapurna Base Camp trek.
If you stay somewhere you need to eat there too and if you speak quietly with the owner many places will let you stay for free if you eat breakfast and dinner. Turning up as a larger group makes this negotiation easier. When we did pay we never paid more than 150 NPR per person for the night.
Hot water was available throughout most of the trek but cost an extra fee, usually around 100 NPR per person. There was cellphone signal as far as Sinwa, past there almost everywhere, including the base camp, had WiFi for an additional fee. We chose to disconnect for a few days.
Always having the summit in sight!
Food on the Annapurna base camp trek
Almost all the huts serve the same menu which is regulated by the authorities and prices are set. The menu is surprisingly good and prices are reasonable, increasing slightly as you get higher up. Dal baht is a standard option it provides great sustenance for trekking, it’s one of the more expensive options on offer but you get unlimited refills so it’s worth it. There are also a range of pasta meals, noodles, rice and egg and toast combinations for breakfast.
Expect to pay 400-700 NPR for a meal and around 60-150 for a tea or coffee.
The menu is very similar at the tea houses along the trek.
Water
Plastic bottles are (thankfully) banned after a certain point so make sure you bring a refillable bottle. Tea houses sell 1L of safe drinking water for between 100-170 NPR or you can bring your own sterilising method. We used our Steripen (UV steriliser) and further up drank directly from the streams or taps without any problems. Get a Steripen here.
Budget tips for trekking to Annapurna Base Camp
The Annapurna Base Camp trek can be done on a very low budget but people often end up spending a huge amount of money trekking in Nepal. Our 7-day trek cost us $150 USD per person including permits and transport. Here are some tips to keep costs down.
Do the Annapurna Base Camp trek without a guide. It’s very easy and safe to do this but if you decide you want one wait until you’re in Nepal to find a guide as it will be much cheaper than booking through an international agency.
Take snacks. The food at the tea houses isn’t super expensive but we saved a lot of money by bringing granola bars and nuts to have for breakfast and snacks instead of buying full meals
Share meals. We got our fill of food but ordering one dal baht and one other meal. The dal baht was easily shared and constantly refilled and meant we could order another (cheaper) meal.
Dal Baht will give you energy for the next day!
Bring a water steriliser. A Steripen or iodine tablets will save you the fee of refilling your drink bottle several times a day.
Travel as a group. We met several other trekkers along the way and teamed up towards the end of the day to get discounts at the tea houses.
Take the bus. Most people take a taxi or jeep to and from the trek but there is a public bus running between Kimchi and Pokhara which costs 400 NPR
What to pack for the Annapurna Base Camp Trek
Make sure you have enough warm layers for when you get to the top. I took:
1 x down jacket (fake, bought in Nepal)

This was enough for the cold evenings and getting up to watch the sunrise. I also might have appreciated a hat. Merino wool is the ideal trekking fabric as it’s lightweight, quick-dry, doesn’t hold odour and is really warm. If you’re a regular trekker or traveller I recommend investing in some. Check out the Ice Breaker range here.
Amazing views of the Himalayas mountain range!
Other useful items
Water steriliser- we use a Steripen. This allows us to sterilise a bottle of water in under a minute using UV. It lasts for 5000L and is lightweight.
Towel – The tea houses don’t provide towels so make sure you bring a small travel towel like this one
Sleeping bag liner – silk is best for temperature regulation and folding up small. We’re pretty sure the teahouses don’t wash and change the sheets every night so it was a nice feeling to get into our own sleeping bag. Check them out here.
Reusable water bottle – you can’t buy plastic bottles up the mountain so make sure you take a water bottle that you can refill at the tea houses. Buy now
Sleeping bag- if you get really cold I suggest hiring one. I had one and it kept me toasty but I would have been ok without it (everyone else we trekked with didn’t bring one) as the huts provide thick blankets.
Hiring trekking Gear in Pokhara
There are hundreds of shops to hire gear in Pokhara. You can get jackets, sleeping bags, rain jackets and even packs from 50-100 NPR per day. There are also lots of trekkers returning with gear they no longer need so ask around at hostels etc before buying anything too pricey as most of the gear is fake anyway.
Shoes: we hiked in sports shoes and had no problems. The only issue may have been in the rain. Thankfully our timing allowed us to stop when the rain got bad but if we were hiking through the rain for any length of time we may have appreciated proper hiking boots. Moral of the story? If you have them, take them, if not don’t worry.
The Annapurna Base Camp trek was one of the most rewarding experiences of our trip so far and we really recommend it to anyone traveling in Nepal. Have you done the trek? What other advice would you give? Tell us in the comments below!







Read about a comparison of the best water purification devices to choose the one that works best for you and is suited according to your purposes. From water filtering bottles, UV purification devices to purification pills. Including easy comparing template!